Wednesday, September 30, 2009

Maple Salmon

I promise our next post will be something without balsamic vinegar or fish (we just noticed that our taste buds have been a little one sided as of late). Hopefully you've enjoyed our cravings. If not, you have our apologies and a tantalizing preview of what is to come in a few days: chocolate zucchini bread.

But I couldn't turn down this simple fish recipe. The maple adds the distinct fall flavor that this season demands, yet it's still a light and healthy meal. Try serving with the Asian Pear Salad or Spinach Tortellini Salad.

We're also wondering how all you readers are feeling about our blog. Do you like what we've been making? Do you want more dinner? Less fish? More vegetarian? More meat? More dessert? Better labels? Or maybe you're indifferent? We'd love to know what you think (and if you don't feel like leaving a comment, try clicking the reactions). Is there anyone out there? Let us know someone is reading our blog!
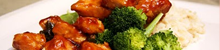

Maple Salmon
Recipe adapted from allrecipes.com
Pictures by Caroline
Serves 4

1/4 cup maple syrup
2 tablespoons soy sauce
2 cloves garlic, minced
1/4 teaspoon salt
1/8 teaspoon ground black pepper
1 pound salmon
  1. In a small bowl, mix the maple syrup, soy sauce, garlic, salt, and pepper.
  2. Place salmon in a shallow glass baking dish, and coat with the maple syrup mixture. Cover the dish, and marinate salmon in the refrigerator about 20 minutes, turning once.*
  3. Preheat oven to 400 degrees F.
  4. Place the baking dish in the preheated oven, and bake salmon uncovered 20 minutes, or until easily flaked with a fork.
*If you're in a hurry, you can get away with about 1o minutes or marinating.

Monday, September 28, 2009

Asian Pear Salad with Honey-Balsamic Vinaigrette

A few days ago a friend of mine brought me a rather large and imposing bag of Asian pears. Why imposing? Because I had very little idea of what to do with an Asian pear. Sure, you can eat them like an apple, but to be honest, they're not my favorite type of pear to eat plain. So what to do with them...after considerable thought, I realized they would probably make an excellent addition to a salad. And I was right. Regular pears tend to get a bit smashed and overly juicy in a tossed salad, but Asian pears, being much firmer, hold up nicely. Plus, the flavor of the vinaigrette is a nice contrast to the super sweet pear.

Try serving with fettuccine with chicken mushroom and arugula or jerk chicken.


Asian Pear Salad with Honey-Balsamic Vinaigrette
Recipe by Kelly
Pictures by Caroline
Serves 4-6

Asian Pear Salad
1 bag mixed greens
1/2 cup lightly toasted pecans or walnuts
2 Asian pears, thinly sliced
1/4 cup crumbled blue or orgonzola cheese
  1. Lightly toast pecans or walnuts by sauteing on low heat just until fragrant. Remove from heat.
  2. In a large bowl, toss mixed greens.
  3. Add pears, nuts, and cheese.
  4. Drizzle vinaigrette over the top (to taste- just do so gradually so you don't end up with salad soup) and toss to coat.
Vinaigrette
1/4 cup olive oil
2 1/2 tablespoons balsamic vinegar
2 tablespoons honey
1/4 teaspoon salt
dash pepper
1 tablespoon water
  1. In a salad dressing cup or mason jar with lid, mix all ingredients.
  2. Shake well to combine. Serve.

Friday, September 25, 2009

Grilled Zucchini Pepper Salad

Yet another way to serve September's most bounteous vegetable (I usually have zucchini coming out my ears by this point). Marinated in balsamic vinegar and paired with red bell peppers. Sweet. Tangy. Delicious.

Try serving with: white fish with orange balsamic glaze.


Grilled Zucchini Pepper Salad
Recipe from Gourmet September 2009
Pictures by Caroline

1 1/2 pounds zucchini, cut lengthwise into 1/4-inch-thick slices
2 red bell peppers, quartered
1/4 cup extra-virgin olive oil, divided
2 tablespoons balsamic vinegar
2 teaspoons packed light brown sugar
2 tablespoons chopped basil
  1. If grilling, prepare grill for direct-heat cooking over medium-hot charcoal (medium-high heat for gas). If broiling, preheat oven to High broil.
  2. Toss vegetables with 2 tablespoon oil, 1/2 teaspoon salt, and 1/4 teaspoon pepper.
  3. Grill (or broil), turning occasionally, until tender, 6 to 8 minutes total. Transfer peppers to a bowl and let stand, covered, 10 minutes. Peel peppers* and cut into 1-inch pieces. Cut zucchini crosswise into 1-inch pieces.
  4. Whisk together vinegar, brown sugar, 1/4 teaspoon salt, 1/8 teaspoon pepper, and remaining 2 tablespoons oil in a large bowl.
  5. Stir in vegetables and basil. Let stand 15 minutes for flavors to blend. Serve warm or at room temperature.
*I believe that peeling the peppers is supposed to allow more vinegar flavor to seep in. If you don't feel like peeling them (because, let's face it, peeling peppers can be a real pain if you haven't let them blister long enough under the heat), it will be just fine with the skins on.

Wednesday, September 23, 2009

Orrechiette Carbonara

Pasta alla Carbonara is a traditional Italian dish originating in the Lazio region of Italy (where you find Rome). Although the exact measurements vary, recipes almost always include cheese, eggs, pork (usually pancetta, aka, bacon) and black pepper, served over some type of pasta. The combination makes a silky, creamy, not too salty (but just salty enough) sauce.


To cook the egg in this sauce, you add near boiling pasta water to the egg and stir vigourously to prevent the egg from curdling. Then you add the pasta water-egg mixture to a warm skillet and stir for a few more minutes, cooking the eggs a little more.

Oh, and in case you were wondering, orrechiete means "little ears" in Italian. They can be a bit hard to find (our store didn't have any), but are well worth it for the name alone!

Try serving with Red Bell Peppers with Spinach and Raisins or Green Beans with Shallots and Toasted Almonds or some sauteed zuchinni squash (for which we do not have a recipe posted...so just slice some squash sprinkled with a bit of salt and pepper and cook them in a small amount of olive oil until lightly browned).

Orrechiette Carbonara
Recipe adapted from Bon Appetite April 2008
Pictures by Caroline

4 bacon slices, diced
2 medium leeks (white and pale green parts only), halved lengthwise, then cut crosswise into 1/3-inch pieces
10 ounces orecchiette (little ear-shaped pasta) or small shells
2 large eggs, room temperature
1/2 cup freshly grated Parmesan cheese plus additional for serving
1/4 teaspoon freshly ground black pepper
1 tablespoon chopped fresh basil
  1. Cook bacon in large skillet over medium heat until crisp, about 8 minutes. Using slotted spoon, transfer bacon to paper towel to drain. Pour off all but 2 tablespoons fat from skillet.
  2. Add leeks and sauté over medium heat until tender, about 6 minutes. Set aside.
  3. Meanwhile, cook pasta in large pot of boiling salted water until just tender but still firm to bite, stirring occasionally. Drain pasta, reserving 1/2 cup pasta cooking liquid (don't forget this step!)
  4. Whisk eggs and 1/2 cup Parmesan in medium bowl to blend; gradually whisk in 1/4 cup pasta cooking liquid.
  5. Add pasta to leeks in skillet and stir to heat. Remove skillet from heat.
  6. Pour egg mixture over pasta and stir until sauce is just creamy and eggs are no longer raw, about 2 minutes. (Return skillet to very low heat if egg mixture is runny; do not overcook or eggs will curdle.)
  7. Add some of remaining 1/4 cup pasta cooking liquid to pasta if needed to moisten. Stir in bacon, basil and pepper. Serve pasta, passing additional cheese separately.

Monday, September 21, 2009

S'more Brownies

Okay, so remember sitting around a camp fire and heating a marshmallow over the open flame, trying not to burn it. You finally get the perfectly roasted marshmallow, delicately place it between two graham crackers and a piece of chocolate...you take that first anticipated bite...and all the marshmallow squeezes out the back and makes a mess of your fingers. Well, these delicious brownies are almost equally as messy, almost. However you get to eat these with a fork, so you can get as much graham cracker, chocolate, and marshmallow in each bite as you want.

These brownies are definitely more exciting than your average boxed brownie and are definitely more fun to look at with the white puff of marshmallow on top. But be forewarned, the directions say to watch the marshmallows closely while cooking, and they mean it. The marshmallows go from white to brown to black in a matter of moments. I would suggest standing by the oven, oven mitts on, oven light on, and you ready to pull them out the moment they are ready.

S’more Brownies
Recipe from the Food Network Kitchens
Pictures by Caroline

Ingredients

Crust:
6 tablespoons unsalted butter, melted
1 1/2 cups crushed graham cracker crumbs
2 tablespoons sugar
Pinch fine salt

Brownie:*
8 tablespoons (1 stick) unsalted butter
4 ounces unsweetened chocolate, chopped
1 cup packed light brown sugar
3/4 cup white sugar
1 1/2 teaspoons pure vanilla extract
1/2 teaspoon fine salt
4 large cold eggs
1 cup all-purpose flour

Topping:
4 cups large marshmallows

Directions
1. Position a rack in the lower third of the oven and heat oven to 325 degrees F. Line an 8 by-8-inch square baking pan with foil so it hangs over the edges by about 1 inch.
2. For the crust: Lightly butter the foil with some of the melted butter. Stir the rest of the butter together with the crumbs, sugar, and salt in a medium bowl. Press the crumb mixture evenly over the bottom of the pan. Bake until golden brown, about 20 minutes.
3. Meanwhile, make the brownie. Put the butter and chocolate in a medium microwave safe bowl. Melt in the microwave on 75 percent power for 2 minutes. Stir, and microwave again until completely melted, about 2 minutes more. Alternatively, put the butter and chocolate in a heatproof bowl. Bring a saucepan filled with 1 inch or so of water to a very slow simmer; set the bowl on the pan without touching the water. Stir occasionally until melted.
4. Stir the light brown and white sugars, vanilla and salt into the melted chocolate. Add the eggs and beat vigorously to make a thick and glossy batter. Add the flour and stir until just incorporated.
5. Pour batter into the prepared pan. Bake until the top is crispy and a toothpick inserted into the middle comes out mostly clean, with a few crumbs, about 40 to 45 minutes.
6. Remove from the oven and carefully position a rack about 6 inches from the broiler and preheat on low. Layer marshmallows across the top and toast under the broiler until golden, (keep an eye on it, it can go quick), about 2 minutes.
7. Cool on a rack, gently removing the brownies from the pan using the aluminum flaps. Carefully separate any marshmallow from the foil and fold away. Cut into 12 (2-inch) squares.

*When I make this recipe again, which I will, I will likely change one of two things. I will either substitute a more a standard brownie recipe for the brownie recipe provided. These brownies were good, but they were almost more like a cake than a brownie and not as sweet as I would have liked. Also, the consensus in my house was that the ratio of graham crust, brownie, and marshmallows would be better with slightly less brownie. Or, the other alternative would be to use the brownie recipe included but halve the recipe to achieve a more even ratio of the graham crust, brownie, and marshmallows.

Friday, September 18, 2009

Roasted Vegetable Salad with Goat Cheese

I made this salad about a week ago for a family gathering, and I was very worried about it. I was worried that the lemon was going to be too strong, that it might be too oily, or that the overall combination might be too mild. I had taken another recipe and added a few more flavors and vegetables, left out a few ingriedents, and this is what I came up with - which I admit turned out to be quite tasty. The combination of flavors is unique and although it might be surprising to find roasted vegetables on a green salad, it is good, at least that is what the family told me, and they wouldn't lie, right?

Roasted Vegetable Salad with Goat Cheese
Recipe and pictures by Caroline

2 red, yellow, or green bell peppers, cut into 1-inch pieces
1 red onion, cut into 1-inch pieces
2 medium zucchini, cut into 1-inch pieces
1 banana pepper, seeded and cut into ½-inch pieces
4 tablespoons olive oil
Coarse salt and ground pepper
1 teaspoon dried rosemary
2 tablespoons freshly squeezed lemon juice
1 ½ teaspoons dried oregano
1 bunch green leaf lettuce
½ to 1 cup crumbled goat cheese

1. Preheat the broiler. In a large bowl, toss vegetables with 3 tablespoons olive oil and rosemary; season generously with salt and pepper. Transfer to a rimmed baking sheet lined with aluminum foil; broil, turning vegetables halfway through, until tender and browned, about 15 minutes. Watch closely as they can easily burn. Let cool to room temperature, about 15 minutes.
2. In a large bowl, whisk together remaining tablespoon olive oil, lemon juice, and oregano; season with salt and pepper. Add roasted vegetables and arugula; toss well. Serve sprinkled with goat cheese.

Wednesday, September 16, 2009

Brocolli-Cheese Quiche

Quiche. Quiche in essence is an egg pie, which does not sound appetizing, but quiche is so much more than egg pie. It is creamy goodness. I like to combine the flavors of broccoli, onion, cheese, and bacon, but you could definitely experiment with other combinations. And quiche is great because you can serve it for breakfast, lunch, or dinner.

Broccoli-Cheese Quiche
Recipe and pictures by Caroline

1 pie crust (I used a pre-made crust, or you could try this)
4 beaten eggs
1 cup half-and-half
½ cup milk
½ med yellow onion, chopped
½ cup chopped broccoli
¼ teaspoon salt
1/8 teaspoon black pepper
Dash ground nutmeg
4 or 5 pieces thick slice bacon (or ham), cut into ½” pieces
1 cup cheddar cheese
1 tablespoon flour

1. Cut bacon into ½” pieces and fry in a skillet until cooked through. Put bacon on a paper-towel lined plate and set aside.
2. In a medium bowl beat together eggs, half-and-half, and milk until well combined. Add the onions, broccoli, salt, pepper and nutmeg. Stir in the bacon (or ham).
3. In a small bowl toss together the flour and cheese. Add to the egg mixture.
4. Pour egg mixture into pie crust (I like to place the quiche on a baking sheet while cooking to ensure that the quiche doesn’t overflow onto the bottom of my oven). Bake in a 325° oven for 40-45 minutes or until a knife inserted near the center comes out clean. Let stand for 5 minutes before serving.

Friday, September 11, 2009

Tomato Cucumber Salad

Last week Caroline and I were trying to think of a good side to go with this fish dish when we decided to post this recipe (which I sometimes don't consider to be a real recipe because it's ridiculously easy). But we both had a sneaky suspicion that we had posted it before. We spent the next several minutes perusing through our blog trying to find this salad..and couldn't find it. So naturally we decided to put it up since everyone should have a quick go-to salad.

But then this morning I accidentally set this to post in 2008 rather than 2009, went hunting for it on our blog history, and found the same recipe (with minor variations) posted just this past June! The horror of a duplicated recipe!

I decided to leave it up for two reasons: (1) The pictures are much better on this one than the one from June. (2) It's a good salad and you may have forgotten about it or never tried it on the original posting. So here's your chance!


Tomato Cucumber Salad
Recipe by Kelly
Pictures by Caroline

Serves 4

1 medium cucumber, very thinly sliced
2 medium tomatoes, cut into 1 inch chunks
2 tablespoons red onion, thinly sliced
3-4 tablespoons apple cider vinegar*
1 tablespoon freshly chopped basil
salt and pepper, to taste
  1. In a medium bowl, mix all ingredients together. Stir well and let sit 5-10 minutes. Serve.
*If you find the flavor of the vinegar to be too strong, add 1 tablespoon water. You can also use white vinegar, though I prefer the apple cider.

Wednesday, September 9, 2009

White Fish with Orange Balsamic Glaze

All I ever want to eat these days is fish. Or rather, the only meat-like substance that I've really really been craving is fish. And I'm not even pregnant- I can only imagine what kinds of cravings I'll have when I have a real excuse. I do, however, grow sick of eating salmon all the time. You can only eat salted-lemon-grilled-salmon so often before it starts to get boring (shocking I know). So let's mix it up a little with some orange rather than lemon, and a white fish, rather than pink.

This fish can be grilled or broiled. Being partial to the broiler (and the lack of mess it leaves behind), we chose to broil. But you may want to get in some grilling while the weather still allows!

White Fish with Orange Balsamic Glaze
Recipe adapted from SELF July 2007
Picture by Caroline

1/4 cup orange juice concentrate
1/4 cup balsamic vinegar
1 tablespoon extra-virgin olive oil
2 cloves garlic, finely chopped
2 tablespoons orange zest
1 tablespoon brown sugar
1 tablespoon finely chopped fresh rosemary
1/2 teaspoon salt
1/8 teaspoon freshly ground black pepper
4 white fish fillets (such as red snapper, orange roughy or tilapia) about 6 oz each
  1. Place first 9 ingredients in a large sealable plastic bag. Shake well.
  2. Add fish and refrigerate 30 minutes to 1 hour. If grilling, remove steaks from marinade and pat dry with a paper towel. If broiling, simply remove, but don't pat dry.
  3. If grilling, coat grill with cooking spray and heat on high. Grill steaks, turning once halfway through, until no longer translucent in the center, about 4 minutes per side. If broiling, place fish on foil-lined and greased baking dish (if you don't line the dish with foil, you will ruin your pan, I promise). Heat broiler to Hi and broil about 4 minutes per side.
One last thing- you may have noticed the "reactions" option you can click at the end of each post- a much easier way to comment on our recipes (though we do still love and appreciate comments). Please let us know what you think!

Monday, September 7, 2009

Mushroom Risotto

Welcome to risotto, the Italian version of rice. But what's the difference between a plain old rice dish and risotto? Here's what trusty wikipedia has to say about it: "the main feature of a risotto dish is the maintenance of starch at the end of cooking that binds the grains together as a cream...Properly cooked risotto is rich and creamy but still with some resistance or bite (al dente), and with separate grains. The traditional texture is fairly fluid...it should easily spread out but not have excess watery liquid around the perimeter."

In other words, first, you coat the rice in butter. Then you add some kind of wine (in this case, white wine). Once the liquid has been absorbed into the grains/evaporated, you increase the heat and gradually add liquid (in this case, vegetable broth) in small amounts while stirring very frequently. This process allows the starch inside of the rice to escape into the liquid, creating a creamy texture. And this creamy texture is what makes risotto different from any other rice dish.

It's not a difficult dish to make, but it does take some patience while adding the liquid and stirring. We definitely think it's worth it.

Mushroom Risotto
Recipe adapted from Bon Appetit December 1999
Pictures by Caroline

3 14 1/2-ounce cans vegetable broth
3 tablespoons butter
3 tablespoons olive oil
1 small red onion, chopped
1 pound assorted mushrooms (such as oyster, crimini or stemmed shiitake), sliced
1 cup arborio rice* or medium-grain rice*
1/2 cup white cooking wine*
1/2 cup freshly grated Parmesan cheese (about 2 ounces)
3/4 teaspoon chopped fresh thyme
  1. Bring vegetable broth to simmer in medium saucepan. Reduce heat to low; cover and keep broth hot.
  2. Melt 3 tablespoons butter with olive oil in heavy large saucepan over medium heat. Add chopped onions; sauté 1 minute. Add mushrooms; cook until mushrooms are tender and juices are released, about 8 minutes.
  3. Add rice and stir to coat. Add wine and simmer until liquid is absorbed, stirring frequently, about 8 minutes.
  4. Increase heat to medium-high. Add 3/4 cup hot vegetable broth and simmer until absorbed, stirring frequently. Add remaining hot vegetable broth 3/4 cup at a time, allowing broth to be absorbed before adding more and stirring frequently until rice is just tender and mixture is creamy, about 20 minutes.
  5. Stir in Parmesan cheese and chopped fresh thyme. Serve warm.
*Our grocery store was out of arborio rice, so we used what we happened to have: sushi rice! It worked just fine.
**I usually avoid using cooking wine when I cook (which seems odd, I know, since it's called "cooking" wine. Personally I don't think cooking wine should even exist) because it adds so much extra salt to your dish. But if you don't have any regular white wine, cooking wine is an acceptable substitute. I would, however, recommend using low-sodium broth if you're using cooking wine.

Saturday, September 5, 2009

Oatmeal Peanut Butter Cookie Sandwiches

I've been on a hunt for a non "traditional" cookie, something a little different than your typical chocolate chip, or oatmeal, or plain peanut butter, but also something that wouldn't take me hours to make. And I think I've found it. All the reviews for this recipe claim the cookies (with a peanut butter filling- we made ours a chocolate filling) taste exactly like the Girl Scout cookie. Having never had the GS oatmeal-peanut butter cookie, I can't really say if they're right. But either way, they're really good and very sweet!

Thursday, September 3, 2009

Potato Salad

I can't believe that summer is almost over and I'm just barely posting a potato salad. What was I thinking? Who makes potato salad in the fall? No one! I guess those of you in a more southern climate may have a few more weeks of bbqs and picnics. The rest of us will have to settle for Labor day.

Anyway. Growing up, my best friend's mom used to make this salad for every "family" (meaning their family plus me or one or two of my siblings) picnic event. She has told me her recipe dozens of times, but I can never seem to make it quite as good as she does. This recipe is a mustard and pickle-free version, which may seem un-American because it is; the author was born and raised in Norway!


Potato Salad
Recipe by Ingunn Andresen
Picture by Kelly

6 medium red potatoes, boiled, peeled, and chopped into large chunks
3 stalks celery, chopped
8 oz Canadian bacon, chopped
1/2 small onion, chopped
3 hard boiled eggs, chopped
1/2 cup mayonnaise*
salt and pepper, to taste**
  1. In a large bowl, mix potatoes, celery, bacon, onion, eggs, mayonnaise and salt and pepper.
  2. Chill and serve.
*Reduce mayo if you like a drier salad; Add mayo if you like it wetter.
**Make sure you taste before you salt! The Canadian bacon adds quite a bit of salt, so be careful before adding more.

Tuesday, September 1, 2009

24-Hour Fruit Salad

This recipe was submitted to us from one of our readers, Jessie. It is a delicious variation on fruit salad, and will make a great summer desert. The recipe calls for pineapple, bananas, mandarin oranges, and grapes. However, I would suggest that you could use almost any type of fruit that you have in your refrigerator. The custard is simple to make, not overly sweet, and very...for lack of better words, fluffy. A great treat to have in the fridge on a warm summer day.

*As a warning, Jessie warns that her husband could probably eat the entire fruit salad in one sitting, so make sure you get your share before you divvy it up to anyone else!

24-Hour Fruit Salad
Recipe submitted by twolittlechef's reader Jessie
Picture by Caroline

3 eggs
3 T flour
12/ t salt
1/4 dry mustard
6 T sugar
1/3 cup lemon juice
1/2 cup water

1 cup whipping cream

2 cups diced pineapple
4 1/2 sliced bananas
4 cups mandarin oranges
2 cups grapes

1. Beat eggs and add dry ingredients, then add lemon juice and water.
2. In a small to medium pot over low heat, cook slowly and stir constantly until very thick dressing forms. Beat 2 minutes; let cool in refrigerator.
3. Whip cream in a frozen bowl until peaks are stiff (the stiffer the peaks the better) Combine custard and cream in a large bowl (add some reserved pineapple juice here to make the cream the consistency that you want, and a bit sweeter).
4. Gently mix fruit into cream dressing. Refrigerate overnight or at least a few hours. The longer it rests the better.
Related Posts Plugin for WordPress, Blogger...